
Lessons from Mountain Summits: The Gear That Actually Matters
What climbing Mt. Washington, trekking to Everest Base Camp, and hundreds of trail miles taught me about the gear you really need
I’ll never forget standing at 17,600 feet on the trail to Everest Base Camp, watching a hiker ahead of me literally dumping gear out of his pack onto the rocky trail. His face was pale, his breathing labored, and he was frantically lightening his load. “Should’ve done this in Kathmandu,” he muttered between gasps.
That moment crystallized something I’d been learning over years of mountain hiking: the gear you carry can make or break your summit attempt. Not in the way outdoor magazines suggest, where you need the latest titanium this or carbon fiber that. But in practical, sometimes painful ways that only reveal themselves when you’re exhausted, the weather turns, or you’re still miles from camp as darkness falls.
I’ve summited Mt. Washington in winter conditions, hiked rim-to-rim in the Grand Canyon, trekked sections of the Appalachian Trail, explored the Rockies, and stood at both K2 and Everest base camps. I’ve done alpine starts that began at 3 AM, multi-day approaches that tested every piece of gear I owned, and winter summits where a single equipment failure could mean serious trouble.
This article isn’t about the gear that looks good in photos or the equipment that impresses other hikers at the trailhead. It’s about the hard-earned lessons that only come from real miles, real summits, and real mistakes. Some of these lessons cost me blisters, soaked gear, and exhausted suffering. Hopefully, they’ll save you from the same.
Lesson 1: Weight Matters More Than You Think (Until It Doesn’t)
The Mistake: My first multi-day backpacking trip, I packed like I was preparing for an apocalypse. Extra everything. Heavy “bombproof” gear because I thought durability meant overbuilt. My pack weighed 45 pounds before food and water.
By mile 8, my shoulders were screaming. By mile 15, I was fantasizing about abandoning half my gear on the trail. Every uphill felt like torture, and I watched lighter-packed hikers cruise past me with what seemed like effortless strides.
The Turning Point: On a three-day approach in the Rockies, I met a through-hiker whose entire pack, including food for a week, weighed less than my empty pack. He wasn’t suffering with inadequate gear; he was covering 25 miles while I struggled with 12. That’s when I got religion about pack weight.
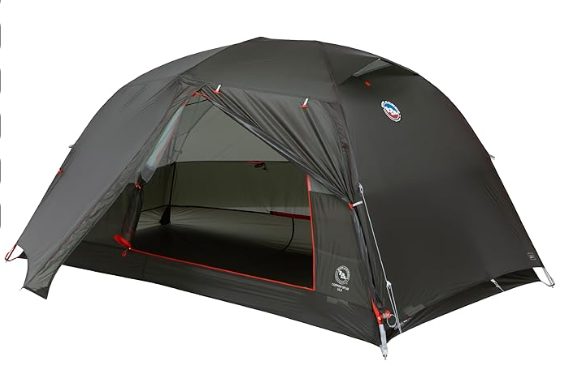
I started weighing everything. Swapped my 5-pound tent for a 2-pound shelter. Replaced my tank of a sleeping bag with a quality down bag that compressed to nothing. Cut my toothbrush in half (okay, maybe I went too far there). Within a year, I’d dropped my base weight from 35 pounds to 18 pounds, and hiking transformed from endurance suffering to actually enjoyable.
But Here’s the Catch: There are places you don’t cut weight. I learned this the hard way on Mt. Washington in February. I’d gotten cocky about going ultralight and skimped on insulation layers to save 10 ounces. When the wind hit 60 mph near the summit and the temperature dropped to -20°F with windchill, those 10 ounces could’ve saved me from mild hypothermia and a scary descent.
What I Carry Now:
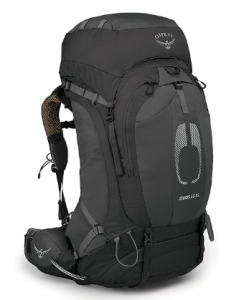
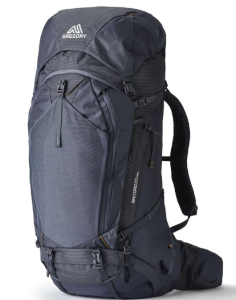
- Backpack: A quality 65L pack (Osprey Atmos AG or similar) that distributes weight properly—3-4 pounds is worth it for comfort on long approaches
- Lightweight but reliable tent: 2-3 pounds for 2-person, not the absolute lightest but proven in storms
- Down sleeping bag: 20°F rated, compresses small, around 2 pounds But: Full safety gear, proper layers, real first aid kit; never compromise here
Bottom Line: Cut weight aggressively on redundancies and luxury items. Never cut weight on the Big Three (shelter, sleep system, safety gear) beyond what’s proven reliable.
Lesson 2: Your Feet Will Make or Break Every Summit
The Boot Story You Need to Hear: I’ve had boots fail me twice, and both times nearly ended trips that took months to plan.
Failure #1: Bought brand-new Salomon boots three days before a Grand Canyon rim-to-rim hike. They looked perfect in the store, felt fine walking around REI. By mile 3 down the South Kaibab Trail, I had hot spots forming. By mile 8, full blisters on both heels. The 24-mile hike became an agonizing death march where every step was pain management. I finished it, but barely, and couldn’t hike for two weeks after.
The lesson? Never, ever wear unbroken boots on a major hike. I don’t care if they’re $400 boots blessed by hiking gods, they need 40-50 miles of break-in before any serious trail. Now I buy boots at least two months before any big trip and walk everywhere in them. Grocery store? Boots. Walking the dog? Boots. My neighbors think I’m weird, but my feet stay blister-free.
Failure #2: On a three-day Appalachian Trail section, it rained. And rained. And then rained some more. My boots, which claimed to be “waterproof,” became water-logged sponges by day two. They gained what felt like five pounds each from absorbed water. My feet were perpetually soaked, pruned, and miserable. Trench foot started developing by the final day.
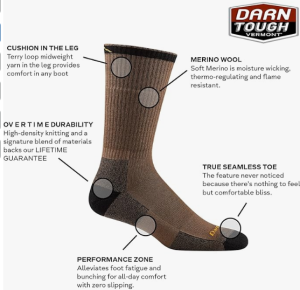
The lesson? Waterproof is a lie in sustained rain. Now I focus on boots that drain and dry quickly rather than trying to keep water out. Paired with good wool socks (Darn Tough or Smartwool) and preventive foot care, wet feet don’t have to mean ruined feet.
What I’ve Learned About Boots:
- Fit is everything: Width matters more than most people realize. Get professionally fitted.
- Break them in: 40+ miles before any serious hike, no exceptions
- The socks matter as much as boots: I carry two pairs of quality wool hiking socks and change them daily
- Foot care is proactive: I tape hot spots before they become blisters, using Leukotape or similar
- Consider trail runners: For dry conditions and maintained trails, many hikers (including me now, sometimes) prefer trail runners over boots
My Current Setup:
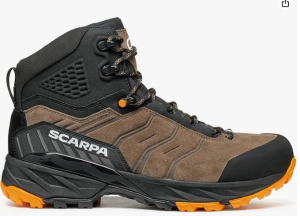
- For Technical Mountain Hikes: Scarpa or Salomon boots, fully broken in, with superfeet insoles
- For Long Distance/Good Trails: Altra or Hoka trail runners with gaiters
- Socks: Darn Tough midweight hiking socks, always two pairs on multi-day trips
- Foot Care Kit: Leukotape, blister bandages, foot powder, small scissors
Bottom Line: Your feet carry you everywhere. Invest in proper footwear, break it in religiously, and learn preventive foot care. Nothing ends a summit attempt faster than destroyed feet.
Lesson 3: The 3 AM Test: Gear You Need When It Counts
The Setup: Alpine starts, beginning your summit push at 2-4 AM are common in serious mountain hiking. You’re trying to reach the summit and descend before afternoon weather rolls in. It’s dark, it’s cold, you’re half-asleep, and your gear needs to work perfectly.
The Story: On Mt. Washington in winter, we started our summit push at 3:30 AM. Temperature was around 5°F before windchill. My hiking partner’s headlamp, a cheap $15 model died within 30 minutes. Not dimmed. Died completely. Fresh batteries, just cold-killed the electronics.
We were above treeline, in the dark, with one headlamp between two people. We had to turn back. Six hours of approach hiking, months of planning, and we turned around less than two miles from the summit because of a $15 headlamp failure.
What I Learned About Critical Gear:
1. Headlamps Are Non-Negotiable Quality Items
I now carry a Petzl or Black Diamond headlamp with:
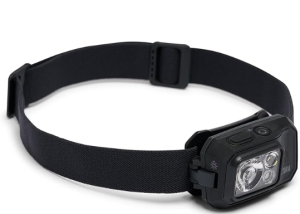
- Minimum 300+ lumens for actual mountain use
- Red light mode for camp/map reading without destroying night vision
- Rechargeable USB (with battery backup option)
- And I always carry a backup lightweight headlamp
Cost: $50-80 for primary, $20 for backup. Worth every penny.
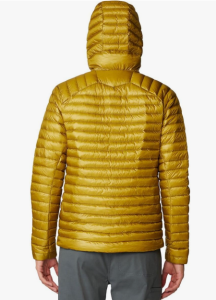
2. Insulation Layers: Puffy Jacket Is Your Best Friend
On that same K2 Base Camp trek, nighttime temperatures dropped below 0°F. My puffy jacket (a 800-fill down jacket) became my constant companion. It went on during every break, at every meal stop, and definitely at camp.
I watched shivering hikers who’d skimped on insulation struggle with the cold. Some borrowed jackets from others. One guy wore literally every shirt he’d brought and still looked miserable.
A quality down puffy (or synthetic equivalent) is one piece of gear that never disappoints. Mine weighs 14 ounces and compresses to the size of a Nalgene bottle. In camp, it’s my pillow. On cold summits, it’s what keeps me functional.
What I Carry:
- Down puffy jacket: 800-fill, hood, 12-16 oz (Patagonia Down Sweater, Mountain Hardwear Ghost Whisperer, or similar)
- Backup insulation: Lightweight fleece or puffy vest
- Rule: It comes on every hike, even summer day hikes, weather changes fast in mountains
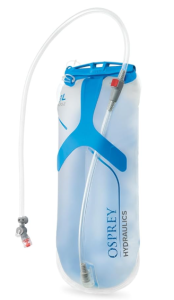
3. Water Systems That Work in All Conditions
Here’s a confession: I resisted hydration bladders for years. Thought they were gimmicky. Then on a brutal 14-mile day in the Rockies with 4,000 feet of elevation gain, everything changed.
I was exhausted. Completely drained. The thought of stopping, dropping my pack, digging out a water bottle, drinking, repacking, and continuing felt insurmountably difficult. But with a hydration bladder, I just…drank. No stopping. No pack removal. No energy expenditure.
That hydration bladder kept me drinking when I was too tired to bother with bottles. Dehydration is subtle, you don’t always feel thirsty until you’re already behind. Having water instantly accessible means you actually drink enough.
My Current System:
- One Nalgene bottle at camp and as backup
- Sawyer Squeeze filter: Fast, reliable, threads onto bottles or bags
- In winter: Bottles only (bladders freeze), kept in insulated sleeves
4. Emergency Gear That Stays in the Pack
I carry items I hope to never use but won’t hike without:
- Emergency bivy or space blanket: 4 oz that could save your life
- First aid kit: More than just band-aids, blister care, pain relief, trauma supplies
- Fire starter: Waterproof matches and a lighter, in separate locations
- Whistle: On my pack strap, barely noticeable until you need it
- Emergency contact info: Written paper in pack with medical info and emergency contacts
Bottom Line: Gear that works at 3 AM in bad conditions is gear you can trust. Don’t cheap out on items you’ll need when exhausted, cold, or in emergencies. That’s when quality gear earns its cost.
Lesson 4: Hydration Isn’t Just About Water Volume
The Revelation: At Everest Base Camp, I watched altitude sickness take down hikers who were drinking “enough” water. They’d followed the “drink lots of water” advice but still got crushing headaches, nausea, and fatigue. The problem? They weren’t just losing water, they were losing electrolytes through respiration and exertion.
What I Learned:
Plain water isn’t enough on demanding hikes. You need:
- Electrolyte replacement: I add electrolyte tablets (Nuun, LMNT, or similar) to at least half my water
- Consistent intake: Small amounts frequently, not chugging at breaks
- More than you think: At altitude or high exertion, 4-5 liters per day isn’t unusual
The Hydration Bladder Advantage (Again):
I mentioned this earlier, but it’s worth emphasizing: when you’re exhausted, a hydration bladder keeps you drinking. It sounds small, but it’s huge. The difference between “I should probably drink” and “I’ll drink at the next break” can be the difference between finishing strong and bonking hard.
My System:
- 3L hydration bladder with electrolyte mix for active hiking
- 1L bottle with plain water at camp
- Sawyer Squeeze filter on sketchy water sources
- Always carry more capacity than I think I’ll need
Pro Tip: In cold weather, blow air back into the hydration tube after drinking to prevent the tube from freezing. I learned this after sucking on a frozen tube for 20 minutes in the Whites.
Lesson 5: Weather Protection Isn’t Optional (Even When the Forecast is Perfect)
The Storm I Didn’t See Coming: Day two of a three-day Appalachian Trail section. Forecast: Partly cloudy, 0% chance of rain. Reality: A pop-up thunderstorm rolled in at 2 PM with zero warning. Within 10 minutes, I was in a torrential downpour with lightning striking nearby ridges.
I had my rain jacket (thankfully), but my pants were just regular hiking pants. Within minutes, I was soaked from the waist down. The temperature dropped 20 degrees. What should’ve been a pleasant 8-mile day became a cold, miserable slog.
The Lesson: Weather in the mountains does whatever it wants. Forecasts are suggestions. Always carry:
1. Rain Jacket (Non-Negotiable)
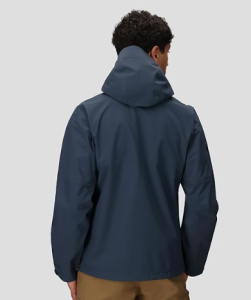
- Waterproof/breathable (Gore-Tex or similar)
- Pit zips for ventilation
- Hood that actually covers your head and adjusts
- Lives in my pack on every hike, even “perfect” weather days
Mine: Outdoor Research Interstellar or similar. Cost: $150-300. Worth it.
2. Rain Pants or Lightweight Shell (Depends on Conditions)
- For long hikes or cold conditions: Full rain pants
- For day hikes: I often skip these but regret it when I do
- Consider wind pants as a lighter alternative
3. Extra Layers (Always)
- That puffy jacket I mentioned earlier
- At least one extra base layer on winter hikes
- Gloves and hat, even in summer (yes, summer, I’ve had snow in July in the Rockies)
What Actually Happens in Mountain Weather:
Temperature drops 3-5°F per 1,000 feet of elevation gain. Add wind, and windchill drops it further. Add precipitation, and wet clothes accelerate heat loss. Combine all three, and you have hypothermia conditions even when the valley is 70°F and sunny.
I’ve seen hikers in t-shirts at treeline shivering uncontrollably when clouds rolled in. “But it was sunny an hour ago!” Yeah, and now it’s 40°F with 30 mph winds and you’re in a cotton shirt. Bad combo.
My Weather Kit (Always Packed):
- Rain jacket (waterproof/breathable, vented)
- Rain pants or wind pants
- Down puffy jacket
- Insulating layer (fleece or light puffy)
- Warm hat and gloves (even summer)
- Extra pair of socks (wet feet get cold fast)
Bottom Line: Pack for the worst weather possible at your destination’s elevation, not the forecast. Mountains create their own weather, and it changes fast. Being prepared means staying safe and comfortable when conditions turn.
Lesson 6: Pack Organization = Summit Success (Seriously)
The Fumble: Picture this: You’re at 14,000 feet, breathing hard, wind screaming, and you need your insulation layer. But it’s at the bottom of your pack. Under your sleeping bag. Wrapped in your tent. You have to fully unpack everything, in the wind, while shivering, just to get the one thing you need.
I’ve been that person. Multiple times. Until I finally learned that how you organize your pack matters as much as what you carry.

What I Learned:
1. Accessibility Matters More Than Perfect Weight Distribution
Yes, heavy items should be close to your back and high in the pack. But critical items need to be accessible without a full pack explosion.
My System:
- Top pocket: Snacks, sunscreen, lip balm, first aid basics, headlamp (daytime)
- Hip belt pockets: Phone, electrolyte tabs, emergency whistle, knife
- Outside mesh pockets: Water bottles, wet items, camp shoes
- Top of main compartment: Rain jacket, puffy jacket, extra layer
- Middle of pack: Food bag, cooking gear, tomorrow’s clothes
- Bottom of pack: Sleeping bag, tent, extra clothes I won’t need until camp
2. Stuff Sacks and Organization
I use color-coded stuff sacks:
- Red: First aid and emergency gear
- Blue: Sleep system (bag, pad, pillow)
- Green: Cooking and food
- Yellow: Electronics and small items
Sounds over-organized, but when you’re tired and it’s getting dark, grabbing the “blue bag” for your sleeping gear without thinking is clutch.
3. The “Oh Shit” Pocket
I keep one easily accessible pocket with genuinely critical items:
- Headlamp and backup
- Fire starter
- Emergency bivy
- Knife/multi-tool
- First aid essentials
If everything went wrong and I had to ditch my pack, this pocket comes with me.
Real World Example: On a winter hike in the Whites, a hiker ahead of me slipped and rolled down an icy slope. Nothing catastrophic, but they needed immediate first aid. I had my first aid kit in my top pocket and was treating them within 30 seconds. Another hiker’s kit was buried in their pack—by the time they found it, we’d already handled the situation.
Bottom Line: Organize your pack so critical items are accessible within seconds, not minutes. The extra time spent organizing at home saves crucial time on the trail.
Lesson 7: You Can’t Summit Tired. Sleep Systems Matter
The Sleepless Night: Second night of a four-day trip in the Rockies. Temperature dropped to 25°F. My sleeping bag was rated to 35°F. I spent eight hours shivering, dozing for minutes at a time, never really sleeping. The next day’s 12-mile hike with 3,000 feet of climbing was absolutely brutal. Every step felt twice as hard because I was running on no sleep.
The Lesson: You can’t fake good sleep in the backcountry. And bad sleep destroys your next day. Your sleep system; bag, pad, pillow isn’t a luxury. It’s what allows you to actually enjoy multi-day trips and summit successfully.
What I Learned About Sleep Systems:
1. Temperature Ratings Are… Complicated
That 35°F rated sleeping bag? That’s the “survival” rating, the temperature where you won’t die of hypothermia. The “comfortable” rating is typically 10-15°F warmer. So a 35°F bag is comfortable around 45-50°F, which means my 25°F night was miserable.
My Current Rule: Buy a bag rated 15-20°F colder than the coldest temperature you expect. For three-season hiking, I use a 20°F bag. For summer only, 35°F works. For winter, 0°F or lower.
2. Down vs. Synthetic: Both Have Their Place
Down (What I Usually Carry):
- Lighter and more compressible
- Better warmth-to-weight ratio
- Lasts longer with proper care
- But: Useless when wet
Synthetic:
- Still insulates when damp
- Cheaper
- Less maintenance
- But: Bulkier and heavier
For dry climates and careful use: Down every time. For wet conditions or budget concerns: Synthetic. I have both and choose based on the trip.
3. The Sleeping Pad Is Half Your Sleep System
I slept on a cheap foam pad for years because “it’s just sleeping on the ground.” Then I upgraded to a quality inflatable pad (Therm-a-Rest NeoAir or similar) and realized what I’d been missing.

An insulated sleeping pad:
- Keeps you warm (ground sucks heat away fast)
- Actually comfortable (shocking concept)
- Makes a huge difference in sleep quality
R-Value explained: It’s the insulation rating. Higher = warmer.
- Summer: R-2 to R-3
- Three-season: R-3 to R-5
- Winter: R-5+
I now carry an R-4.5 pad for three-season use. Weight: 16 oz. Worth every ounce for actual sleep.
4. The Pillow Question
I mocked people who carried camp pillows. “Just use clothes in a stuff sack!” Then I tried an inflatable pillow (Sea to Summit Aeros or similar). Weight: 2.5 oz. Packs to nothing. Actual neck support and comfort.
Turns out sleeping with proper head support helps you actually sleep. Who knew?
My Current Sleep System:
- Bag: 20°F down sleeping bag (Western Mountaineering, Feathered Friends, or similar premium brand) – 2.5 lbs
- Pad: Insulated inflatable pad, R-4.5 – 16 oz
- Pillow: Inflatable camp pillow – 2.5 oz
- Total: About 3 pounds for legitimate, restorative sleep
Bottom Line: Don’t cheap out on sleep gear. The weight investment pays off in energy, morale, and your ability to actually enjoy the hike. Bad sleep is miserable and dangerous. Good sleep is worth the extra pounds.
Lesson 8: When Tech Fails, Analog Saves You
The Dead Battery Story: Day three at K2 Base Camp. My phone which had my maps, my GPS tracks, my photos, my everything, died. Completely. Despite a power bank that was supposed to have 5 full charges. The cold killed both devices.
Luckily, I had paper maps. Luckily, I had a compass. Luckily, I’d actually learned how to use them years earlier. But I watched other hikers panic when their devices died. Some had no backup navigation whatsoever.
What I Learned:
1. Digital Navigation Is Amazing Until It Isn’t
GPS watches, phone apps like Gaia or AllTrails, and dedicated GPS units are incredible tools. I use them on every hike. But:
- Batteries die (especially in cold)
- Devices break (drops, water damage)
- Electronics fail at the worst times
- Cell service is often nonexistent
My Navigation System:
- Primary: GPS watch (Garmin or similar) with route loaded
- Secondary: Phone with downloaded offline maps (Gaia GPS or similar)
- Backup: Paper map and compass that I know how to use
- Power: Battery bank rated for cold, kept inside jacket
2. Paper Maps Aren’t Nostalgia
I carry printed maps for any serious hike. They:
- Never run out of batteries
- Work in any conditions
- Give better overall terrain awareness
- Weigh almost nothing
Cost: $10-15 per map. Zero ongoing cost. Infinite reliability.
3. Compass Skills Are Worth Learning
I spent one afternoon learning basic compass navigation:
- How to take a bearing
- How to triangulate position
- How to follow a bearing in low visibility
That knowledge has bailed me out twice when visibility dropped and I couldn’t rely on GPS alone.
Real World Example: On a foggy descent from Mt. Washington, visibility dropped to about 50 feet. The trail was hard to follow. My GPS watch was acting wonky (too many clouds, weak signal). I pulled out my compass, took a bearing based on my map, and navigated down confidently while other groups were second-guessing every turn.
What I Carry for Navigation:
- GPS watch with route loaded
- Phone with offline maps and backup battery
- Waterproof paper map
- Compass (basic orienteering compass, $20)
- Basic knowledge of how to use all of the above
Bottom Line: Digital tech is your primary tool. Analog backup is your safety net. Always have both. Always know how to use both. The mountains don’t care about your dead battery.
Lesson 9: Emergency Gear You Hope to Never Use
The Close Call: Second day of a solo hike on the Appalachian Trail. Slipped on wet rocks crossing a stream. Went down hard. Felt something pop in my ankle. For about 30 seconds of panic, I thought I’d seriously injured myself, miles from the nearest road, solo, with no way to call for help.
Turned out to be a bad sprain, not a break. But in those moments of uncertainty, I was extremely grateful for the emergency gear in my pack. Even though I didn’t need the serious stuff, knowing I had it provided mental security.
What I Learned:
Emergency gear falls into two categories:
1. Stuff You’ll Probably Use (First Aid Basics)
These aren’t “emergency” items: they’re regular hiking tools:
- Blister treatment (Leukotape, Compeed, moleskin)
- Pain relievers (ibuprofen for inflammation, acetaminophen for pain)
- Antihistamine (bee stings, allergic reactions)
- Athletic tape
- Gauze and bandages
- Tweezers and small scissors
- Triple antibiotic ointment
I use something from this kit on probably 30% of hikes. It’s not paranoia; it’s practical.
2. Stuff You’ll Hopefully Never Use (Real Emergency Gear)
This is gear I carry but haven’t needed (knock on wood):
Emergency Shelter:
- SOL Emergency Bivy or space blanket
- Weight: 3-8 oz
- Cost: $10-40
- Could save your life in hypothermia conditions
Fire Starting:
- Waterproof matches in waterproof container
- Backup lighter
- Fire starter cubes or similar
- Stored in separate locations (one in emergency kit, one in cooking kit)
Signaling:
- Whistle (on pack strap)
- Bright orange stuff sack that could be used as signal flag
- Headlamp strobe function
Communication:
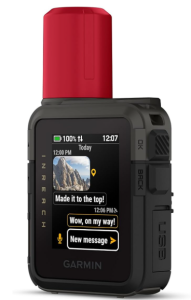
- For serious remote trips: Garmin inReach or similar satellite communicator
- Cost: $300+ device plus subscription
- Two-way texting and SOS function
- Worth it for solo hiking or remote areas
Medical Beyond Basics:
- Israeli bandage or similar pressure bandage (serious bleeding)
- SAM splint (fractures)
- Medications specific to me (EpiPen if allergic, prescription meds, etc.)
Repair Kit:
- Duct tape (wrapped around hiking pole)
- Safety pins
- Zip ties
- Needle and thread
- Tenacious Tape for gear repairs
The Mental Math:
I carry about 1-1.5 pounds of emergency gear I hope to never use. Is it worth it?
On a day hike: Maybe not all of it. On a multi-day remote trip: Absolutely. On a solo hike: Non-negotiable.
Real World Perspective: I was once on a hike when another hiker had a serious allergic reaction to a bee sting. Their face swelled, breathing became difficult. They had no EpiPen. We were 5 miles from the trailhead. Someone in our group had an EpiPen for their own allergies and potentially saved that person’s life.
Emergency gear isn’t just for you—it’s for anyone you might encounter who needs help.
My Emergency Kit (Always in My Pack):
- First aid supplies (8 oz)
- Emergency bivy (4 oz)
- Fire starters (2 oz)
- Repair kit (3 oz)
- Whistle (on pack strap)
- For remote trips: Satellite communicator
Total weight: About 1 pound of “hope I never need it” gear.
Bottom Line: Emergency gear isn’t paranoia, it’s insurance. The time you need it, you’ll be desperately glad you have it. Pack it, know how to use it, hope you never do.
Lesson 10: Buy Once, Cry Once (But Know When Budget Gear Works Fine)
The Expensive Lesson: Early in my hiking journey, I bought the cheapest version of everything. $40 tent from Amazon. $30 sleeping bag from a big box store. Budget backpack that looked like it could work.
By the end of my first season, I’d replaced almost everything. The tent leaked. The sleeping bag compressed into uselessness. The backpack’s straps shredded. I’d spent $300 on budget gear and still needed to buy $800 in replacement gear.
If I’d bought quality gear initially, I’d have saved $300 and a season of frustration.
But Here’s the Nuance: Not everything needs to be premium. I’ve learned where to invest and where budget options work fine.
Where to Invest (Buy Quality Once):
1. The Big Three (Shelter, Sleep System, Backpack)
These three items are your home in the backcountry. Quality matters:
- Tent: $300-500 range gets you something that’ll last 10+ years and actually keep you dry. Big Agnes, MSR, Nemo, REI Co-op make excellent tents. My tent is 7 years old and still going strong.
- Sleeping Bag: $300-600 for a quality down bag from Western Mountaineering, Feathered Friends, or similar. Will last 15+ years with care. My bag has over 100 nights and looks new.
- Backpack: $250-400 for proper fitting, durable pack from Osprey, Gregory, ULA, or similar. A good pack makes every mile easier. Worth every penny.
2. Footwear
Already covered this extensively, but: Don’t cheap out on boots or trail runners. $150-250 spent on proper footwear saves your feet, knees, and entire experience.
3. Rain Jacket
A quality waterproof/breathable shell ($200-350) lasts for years and actually keeps you dry and comfortable. Cheap rain jackets either leak or turn into saunas.
Where Budget Gear Works Fine:
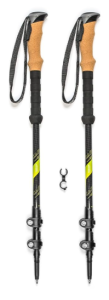
1. Trekking Poles
My $35 Cascade Mountain Tech poles from Costco have lasted 4 years and hundreds of miles. Do $200 Black Diamond poles work better? Marginally. Are they 6x better? No way. Budget poles work great.
2. Stuff Sacks and Organization
Generic stuff sacks from Amazon work just as well as branded ones. Save the $40.
3. Camp Towel
Any lightweight microfiber towel works. Don’t pay premium for hiking brands.
4. Water Bottles
Nalgene is iconic, but cheaper alternatives work identically. It’s a plastic bottle.
5. Basic Accessories
Carabiners, cord, bag clips—generic versions are fine.
The Smart Shopping Strategy:
For Critical Gear (Big Three, footwear, rain jacket, insulation):
- Buy quality brands with proven track records
- Shop sales but don’t compromise on fit or features
- REI used gear, garage sales, and end-of-season deals can save 30-50%
- Consider it an investment: Cost per use over 10 years makes it cheap
For Everything Else:
- Start with budget versions
- Upgrade only if they fail or frustrate you
- Many budget items work perfectly fine
Gear That’s Lasted Me 5+ Years:
- Osprey Atmos 65: 7 years, still perfect (retail $280)
- Western Mountaineering sleeping bag: 6 years, works like new ($450)
- MSR Hubba Hubba tent: 7 years, replaced stakes and guylines, tent body still solid ($400)
- Petzl Actik Core headlamp: 5 years, hundreds of hours of use ($80)
- Darn Tough socks: Various pairs, 3-6 years, lifetime warranty honored ($25 per pair)
Total investment: About $1,200 in gear that’s lasted 5-7 years = about $200/year for my entire core sleep/shelter/carry system.
Gear I’ve Replaced Multiple Times:
- Cheap Amazon tent: Twice in 2 years before I upgraded
- Budget sleeping bag: Once per season for 3 seasons
- Cheap backpack: Three times before buying quality
- Bargain boots: Two pairs in one year
Those replacements cost me more than buying quality first time.
The Real Lesson:
“Buy once, cry once” applies to critical gear that affects comfort, safety, and experience. For everything else, budget options often work great.
The key is knowing which category each item falls into.
Conclusion: My “Don’t Summit Without It” Essentials
After years of mountain hiking, base camp treks, and countless trail miles, here’s what I never leave behind:
The Core System:
- Quality backpack that fits properly (65L for multi-day)
- 20°F sleeping bag and insulated sleeping pad
- Reliable tent or shelter system
- Broken-in boots or trail runners
- Rain jacket (waterproof/breathable with pit zips)
- Down puffy jacket
- Hydration bladder (3L) plus backup bottle
- Water filter (Sawyer Squeeze)
- Proper layering system (base, mid, insulation, shell)
The Critical Accessories:
- Reliable headlamp plus backup
- Paper map and compass
- First aid kit (comprehensive, not minimal)
- Emergency bivy and fire starters
- Extra food (always 20% more than planned)
- Trekking poles (even if I don’t think I need them)
- Sun protection (sunglasses, hat, sunscreen)
The Weight Balance:
- Base weight (everything except food/water/fuel): 18-22 lbs
- Could go lighter, but not without sacrificing comfort or safety
- Every item earns its place
What I’d Tell Myself Starting Out:
- Quality gear isn’t expensive; replacing cheap gear is expensive
- Your feet matter more than anything, invest in footwear and foot care
- Weight matters, but safety and comfort matter more
- The gear that works at 3 AM in bad conditions is the gear you can trust
- Analog backups (maps, compass) aren’t optional
- Emergency gear you never use is still worth carrying
- A hydration bladder will change your hiking life
- Learn preventive care (blisters, dehydration, hypothermia) rather than reactive treatment
- Organization matters as much as what you pack
- The mountains will teach you what matters—sometimes the hard way
The Real Truth:
Gear doesn’t make you a mountaineer. Miles do. Experience does. Suffering through mistakes and learning from them does.
But the right gear, proven, reliable, properly chosen gear makes those miles more enjoyable, safer, and more successful. It’s the difference between surviving a summit attempt and actually enjoying it.
Every piece of gear I carry has earned its place through real use, real conditions, and sometimes real failures. These aren’t theoretical recommendations from gear reviews, this is what actually works when you’re tired, cold, wet, and still miles from camp.
The mountains don’t care about gear reviews or marketing hype. They care about whether your equipment works when it matters. After all these summits, all these miles, and all these lessons, that’s what I pack for: the moment when it matters.
Questions about gear or want to share your own lessons? Drop a comment below. The hiking community learns best when we share our experiences; both successes and face-plants.
See you on the trail.
Affiliate Disclosure: This article contains affiliate links. If you purchase gear through these links, I may earn a small commission at no extra cost to you. I only recommend gear I’ve actually used or would confidently recommend based on extensive research. Your support helps keep this site running and allows me to keep sharing honest, experience-based gear advice.